|
Walkthrough
Level 7
|
|
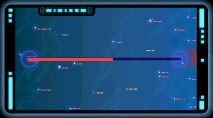
THE GARDENS OF KADESH
[19:3:11:3]
- The (E)fighters (called 'Swarmer's and 'Advanced
Swarmer's) in this level ignore height and largely stick
to the height of your MS. They will target and destroy
any offensive CSp's, given the chance, so move your RS,
D's, AF's, IF's and IAF's [A] or [U] far enough that you
can't see them with Tactical Overlay
-
Move your SCr into wings. Position one wing [FR], one
slightly below this one, and one [F] but close to the MS.
Agressive tactics advised
- Move the Carrier to an area near RU strands, above or below
the height of the MS along with your RC's (and RCn if you
have one)
- Set your SF's to Evasive (so they don't attack (E)SCr) and
position them [F] and slighlty [A] so that your SCr can
dock with them easily (faster turnover than with the MS).
Possibly set an Evasive AF to guard each SF
- When you are 'ready' for battle, set your RC's to Harvest
- Set the majority of your SCr on the (E)SCr which begin docked
with their (E)Fuel Pods; when they are stationary like this,
they are much easier to take out
- The (E)SCr can only have two attack passes before they need
to refuel. Keep harrowing them and when they get low on fuel
they will burst readily
- You can set one team (say of AB's) to destroy each (E)Fuel
Pod to leave the (E)Swarmers adrift
- Alternatively, if you get a break when no (E)SCr are near the
(E)Fuel Pods, you can salvage them. They give you 300RU's
each when retired. The (E)SCr will attack
any SC's they see near their pods, though
- Do not attack the (E)MS this level. It's guns are fairly
effective against your SCr but I think you cannot burn it
until next level. Even if you set your entire bunch of D's,
IAF's, IF's and AF's on it, it suffers no damage and merely
HS's to another area on the map (it circles your MS
counter-clockwise). (Bug Alert: the reason we are trapped in
this area and cannot HS out is because there is a strong HS
inhibitor field here. How, then, can the (E)MS HS since (in the
following cutscene you learn) it has an identical HS signature
to our own?!?)
- It is good to have a wing always hanging around it though, since
it spurts (E)SCr out of its neck periodically
- At some point, a few wings of (E)SCr will head off to beat up
one of your RC's. Set a wing of Interceptors on them (and some
Scouts to add to their confusion). NB: Swarmers will easily
outrun Interceptors on the straight)
- Do not forget to refuel your SCr with the SF's (or Carrier, RC
or RCn) or they will be useless
- Fleet Command will tell you "the Hyperspace Module is fully
charged". Set an Evasive Scout to follow the (E)MS. Keep killing
the (E)SCr. (NB: Do not HS; the 'Quantum Waveform' will
collapse, your SCr will be docked and your CSp's easy targets in
Military Parade)
- Keep burning the (E)SCr until they stop emerging. The (E)MS will
disappear from the Sensors Manager. Rescue any remaining (E)Fuel
Pods and retire them
- Dock your SC's with the Carrier (so you can get them out quickly
next level)
- Finish Harvesting their precious Religious Artifacts