|
Walkthrough
Level 8
|
|
THE CATHEDRAL OF KADESH
[10:24:17:7]
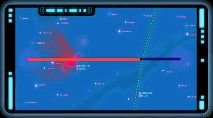
- Pause as soon as possible
- Set all heavy artillery (D's, IAF's, etc) on the (E)MS [FA] to
stop it spurting out more (E)SCr. Ensure they do not try to ram
it
- Send 6xSC's to [LB] of the enemy MS and set a pair each
on the 3x(E)MBF's. These SC's will be ignored by the enemy ships
- Set your wings of SCr onto the (E)SCr but take care not to select
the 3x(E)MBF's as hostile targets
- A few wings of (E)SCr will ascend to the MS so set your AF's
onto them; they're just a minor distraction for the moment but
keep the AF's on them so they don't start to target more vulnerable
CSp's
- Move your Carrier [A] and slightly [F] so that the SC's can convert
the MBF's quicker
- Set your Scouts to Guard the IAF's since the (E)SCr start to pick
on these lumbering lazers and Scouts are adept at weaving between
their Solar Panels
- Activate a SF's special over the heavy artillery. Order half your
SCr to Dock with SF's
- Once the 1st (E)MS is blown, move the heavy artillery to [LB] and
slightly [U]. Target them on the (E)MS once it is in view. NB: MBF's
are very effective in this; their four Ion Beams make them very
powerful against large targets but since they are such tiny craft,
they are hopeless at aiming and so will probably beam some of your
own ships (especially once their target is destroyed)
- 2x(E)MBF's will arrive [RA] so set a pair of SC's on each. Shortly
afterward, 2x(E)MBF's will arrive [LA] so set a pair of SC's on each
- Keep your SCr taking out the (E)SCr because some will take an
interest in the SC's around the (E)MBF's
- Make sure the (E)MS does not ram your CSp's. It can do little to
shoot them but its shields are stronger than their so it suffers
less than they when it rams them. Ensure the other half of your
SCr do not run dry
- 3x(E)MBF's will arrive where the first three came from. Rescue them
- Once the 2nd (E)MS bursts, you will only get one more batch of (E)SCr
from the 3rd (E)MS before it retreats to the other end of the map.
Wipe up the remaining (E)SCr and repair your CSp's
- Salvage any remaining (E)Fuel Pods and Retire them
- Dock your SCr with your Carrier (with Autolaunch disabled) so they
don't waste fuel. Replace any lost Interceptors with MGC's but give
them their own Control Group
- Set your 2xD's, 10xMBF's to Military Parade with your Carrier and
move it two-thirds of the way to the retreat point
- Send your Scouts out to Scout. There will be a line of 7x(E)MBF's
between your Carrier and the (E)MS which you want to rescue. There
will also be three sets of 2x(E)Fuel Pod which you might like to
Retire. Once the Scouts find the two wings of (E)Interceptors, set
them to Evasive and target your Interceptors on the (E)SCr
- Once the (E)SCr are spaceDust, it is safe to let your RC's loose on
all those groovy streamers of RU's <grin>
- Set your 14xSC's onto the 7x(E)MBF's from above; they will detect
your SC's but will take too long to aim to do any damage
- (Question: Just a little bit closer to your MS than the left-most
pair of (E)Fuel Pods there is a hexagonal frizbee. Anyone know
what it is for?)
- Set your 10xMBF's to take out the (E)MS and your wing of MGC's to
do for the (E)SCr
- Retire the (E)Fuel Pods
- Finish Harvesting their precious Religious Artifacts and converting
your new ships