|
Walkthrough
Level 9
|

|
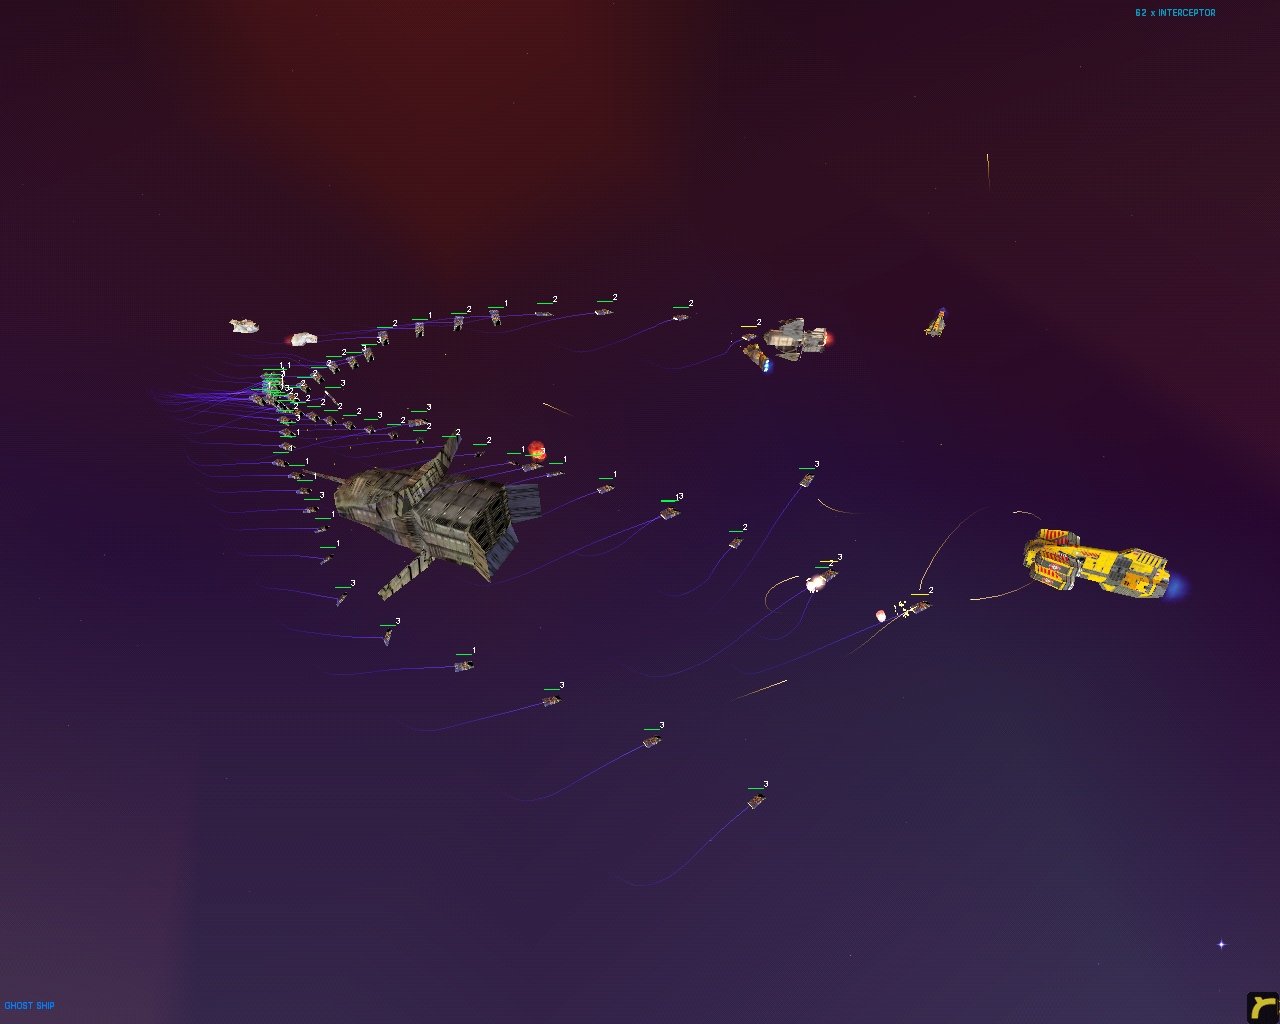
Deep Space - Sea of Lost Souls
[28:6:1:0]
- No hurry in this level
- Keep all your CSp's in Military Parade with the MS except you may
want your SF's
- Set your RC's to Harvest
- Either: Mass Mob and CleanUp Squad
[8:6:20:0]
- Move your SF's and Carrier to the area around the Ghost Ship.
Keep them a bit further out than 'just out of sight range' so
that you can see the (E)MD, 2x(E)MBF's, (E)IAF , 2x(E)AF's but
when your SCr finish Docking, they are not close enough
to be seen by the enemy
- Move your entire collection of SCr to the area and encircle the
Ghost Ship. Have your SC's nearby
- Set your Evasive Scouts to attack the (E)MD from the opposite
side of the Ghost to it. This way it will waste its volley because
the missiles will hit the Ghost. Keep activating the Scouts'
special so that they don't get hit by the missiles
- When the (E)MD is occupied with the Scouts, send in the rest of
your SCr from all angles at once to attack the Ghost. They should
be in Evasive or normal tactics
- At an opportune moment, set a pair of SC's on each (E)MBF to remove
their danger to your SCr. Take them as far as the SC's will go and
then drop them; they are inactive outside the Ghost Ship's Sphere Of
Influence. Repeat for the (E)IAF. The others are too hard to rescue
- If you can manage it, set an SC on the Ghost itself. It will latch
onto the top of the Ghost, just aft of the bridge, and start
downloading (the orange bar under the Fuel and Health bars). If you
can get this back to Fleet Command, I don't know what will happen;
the (E)AF's kept killing my SC as it unlatched
- Dock your SCr with your SF's, one Control Group at a time (so you
can keep track of who still needs a drink). Also Dock any units
low on 'health'
- When Fleet Intel tells you you are slowly wearing down its armor,
you're about 60% done. Keep it up
- This will last about 15 minutes
- Or: Clean, Quick and Painless
[28:6:1:0]
- Build lots of MGC's. I had 20 SC's so could only build 30 MGC's. Two
wings of 10xMGC's each is sufficient.
- Move a SF to near the Ghost. Doesn't have to be close enough to see
it (use the Tactical Overlay)
- Dock about 10 Scouts with the SF to make sure they're full and healthy.
Set them to Evasive and the MGC's to Agressive
- Send one wing of MGC's to the left side of the Ghost and the other to
the right of the Ghost
- Set the Scouts onto the Ghost (use their special)
- Wait until the Ghost's slaves get moving and then send in one wing of
MGC's (the one on the far side of the Ghost to its slaveships) to
attack the Ghost
- Wait until the Ghost's slaves alter course and then set the other
wing of MGC's on the Ghost
- The Scouts ought to be too Evasive to get hit but will draw quite a lot
of fire from the (E)MD
- The MGC's will circle the Ghost closely, firing frequently. The beamers
might be able to slice a few but will find it hard to keep focusing
on them as they disappear behind the Ghost and the other wing reappears
on the other side of the Ghost. The missiles aren't very powerful against
the MGC's superior armor
- If you find your MGC's are being shot too much (or if you loose one) try
sending in some of those obselete Interceptors to absorb a few missiles
and block Ion beams
- Within ten seconds, Fleet Intel will give you the good news
- Within twenty the battle is over. Hopefully you will have got rid of any
Interceptors you brought along. And not lost any MGC's. And still have five
Scouts or so.
- Dock the SCr you used with SF's to repair and refuel them
- Send a SC to the Ghost
- Reassign your control groups to include your new ships
- Harvesting ought to have completed ages ago