|
Walkthrough
Level 10
|
|
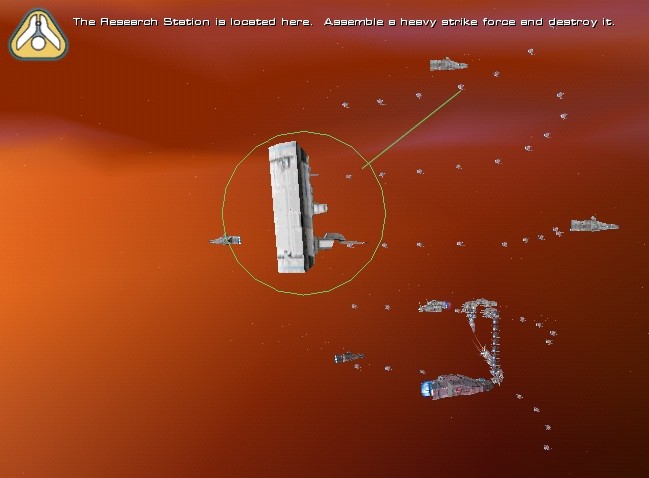
Super Nova Research Station
[7:10:1:0]
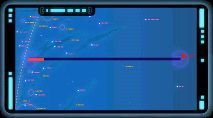
- Fleet Intel gives you the mission briefing, odd
though it seems, in which you are given a quick look at the
spacestation (if none of your ships are there, and this is the
first time Kharakan forces have been here, how is it possible for
us to see the spacestation when we haven't even sent out a probe?)
To take advantage of this loophole / error, pause the game at this
juncture and take a look at what you're up against. For your
convenience, the view
is reproduced for you below.
- Set your 19xMBF's to Sphere formation (so that they take up little
space)
- Set Autolaunch on your Carrer to off and Dock all your SC's and one
(sacrificial) Interceptor with it
- Turn Tactical Overlay on
- Send it [LF] and very slightly up, along the asteroid arm the leads
most directly toward the Station. Escort it with the MD and all your
MGC's. Activate your SFs' special on it. At least 2xSF's are required
- While that group is getting ready to leave, send a bunch of D's [L]
almost to the end of the asteroid arm
- Your MBF's should now have arranged themselves. Send them after the
D's, but only as far as the turnoff down to the right (a short
distance closer than the D's will stop)
- Soon your Carrier and its followers will notice two red X's ahead.
Set your MD on the (E)Scouts so that they go for it. Set your MGC's
on the (E)Corvettes
- Use the SF's to repair anything that gets a bit broken
- The Carrier will continue on into a minefield. But that's alright
because "Support is on the way; hang in there"
- As soon as Tactical Overlay shows the (E)Minelayer Corvette and most
of the nearby mines are heading for your Carrier, set some MGC's on it
- Repeat
- By now, maybe one of your other teams will be in position. Send the
MBF's down the right-hand turnoff and make sure they stay under cover
of asteroids or they'll pop.
-
Send the D's straight down to where the
5x(E)AF's are waiting. Once the attack order has been issued, try to
move the D's into the asteroid stream (they will continue to attack)
- When the MBF's can see 5x(E)AF's in their path using Tactical
Overlay, break their formation and set them on the (E)AF's
- Get the D's to retrace their path back to the MS once their (E)AF's
are spaceDust
- When the MBF's are done, reform them to Sphere and send them straight
up (through the radiation) to just behind your Carrier where your SF's
can repair them
- While they're on their way, move your Carrier forward (SF's in
attendance) until Tactical Overlay shows (E)CSp's ahead. Get the
Carrier to spew out all your SC's. Set the Carrier to edge forward
until it activates the 2x(E)D's and (E)HC. The (E)CSp's will start
beaming your Carrier
- Set 3xSC's on each (E)D. When they are safely secured, set 5xSC's on
the (E)HC but take care that they don't ram it and pop. Your new ships
will make their slow way back along the asteroid arm for conversion
- Move your Carrier and escorts along the arm until you can see the
Station. Take care that the SC's (which are probably in Military
Parade) do not enter the radiation. Get your SF's to repair the
Carrier, then the MBF's behind it while the MGC's dock with them
- Position the MD below the Carrier, pointing toward the station, with
the two wings of MGC's to its flanks (ie the MD's flanks). Set them
all to normal tactics
- Launch your Interceptor from the Carrier and set it to Evasive. Move
it to right in front of the middle of the (E)Station's face, between
the arc of (E)Defenders and the (E)Station, just outside its Portal.
(This ought to be the only ship lost this level)
- Fleet Intel will give you a cutscene, telling you that their (E)Carrier
is trying to HS out of the area. It will move away from the (E)Station,
rising (conveniently) into the asteroid arm right in front of your MD
- It will be squirting (E)MGC's out as it rises; set your MD to take care
of them. They'll soon notice and start to attack your ships. Keep
retargetting the MD on the (E)MGC's which emerged most recently and
have your MGC's swatting the stray (E)MGC's circling your Carrier
- The (E)Carrier will turn toward your MS and stop spitting out its
(E)MGC's. It is now safe for your 5xSC's to latch onto it and tow it
back to your MS without having to worry about the radiation
- Dock your MGC's with the SF's
- If you don't have 12 SC's by your Carrier and want 2x(E)AF's and
4x(E)IF's, wait until the 2x(E)D's are admitted to the MS, select
those SC's and tell them to Dock with the SF's by your Carrier.
Otherwise, see Harvesting below
- Form your MGC's into two wings. Move your Carrier to the bottom of the
asteroid stream. Move 4xSC's to its left
- For best results, send the MGC's to attack the near-side, lowest line
of (E)Defenders co-ordinated with sending your 4xSC's on the
2x(E)AF's there. The (E)AF's will target the MGC's until they are out
of range and by then will be being towed up to your Carrier
- Your MGC's will make light work of the (E)Defenders so while they're
mowing them down, set a pair of SC's on each (E)IF. While your SC's
are queueing in front of your Carrier, you can 'heal' them with your
SF's
- Select your MBF's and set them on the (E)Station after breaking their
formation. It will flare and burn in no time
- Dock your unoccupied SC's with the Carrier permanently. Move the MBF's
and MGC's back into the asteroid stream and head them back to the MS
- Harvesting: it is okay to send the RC's into the irradiated void since
each time they dock with a RCn or Carrier, they are repaired. So move
the new Carrier and a RC to the cloud of RU's [BL] and slightly [U].
Move a RCn and a RC to the middle of the asteroid stream [FA]. Set the
RC's to Harvest. (NB: if it is hard to see RU's in the Sensors Manager,
set the resolution to 640x480 and zoom out to the fullest extent)
- There are also resources near to where the two groups of 5x(E)AF's
used to be
- (Hint: if you find it hard to navigate in this level because the Super
Nova in the background is so bright, press 'Esc', 'Options', 'Video',
'Custom' and turn off 'Background Images')