|
Walkthrough
Level 14
|
|
BRIDGE OF SIGHS
[3:178:3:(155)]
- Set the RC's to Harvest (watch to make sure they don't enter the Sphere Of
Death throughout the level)
- Move a RCn [F] and a little bit [LA] to the small clouds there, and another
RCn [F] and a little bit [RA] to the other distant cloud, a RC with each RCn
- Move all your Carriers [F] until they are just out of sight of the closest
(E)IF's. There are a few RU's floating around in space 'up for grabs' on this
level but most of them are already invested in enemy units <grin>
- Also take all your SC's with the Carriers, and your D's to absorb enemy fire.
MD's should be placed at the fringes of your mobile force to warn of incoming
(E)SCr and weaken them early. All SF's should be set to Support
your wing of D's
- Nothing goes anywhere near your MS on this level so take whatever you want
with you although some untis (HC's for example) just lumber around and get in
the way until you are ready to tackle the Mission Objective
- Interceptors and Scouts are useful for luring the (E)IF's out of their pretty
formation
- (If you plan on taking and keeping all the (E)IF's, and if there are any ships
you suspect you will want to build in later levels, build them now. Once you
have taken the bulk of the (E)IF's, Fleet Command will complain "Maximum number
of ships in the fleet" if you try to build more of anything)
- For most efficient recuing of the (E)IF's, set your Carriers in a 'wall' square
so that SC's can take the (E)IF's to the closest Carrier and dump it (to go get
the next (E)IF)
- Send a small force of Evasive small-fry (ie Interceptors or Scouts) to hassle
the closest (E)IF. All the (E)IF's point outward (what a miserable existence...
staring out all year into the empty blackness of space with not even a peep at
the thing they are defending... but we can change all that for them and give
them a new lifestyle; vision, adventure, excitement, movement, death and glory!)
so once it has started to move, retract the small-fry and await the catch
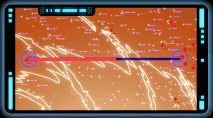
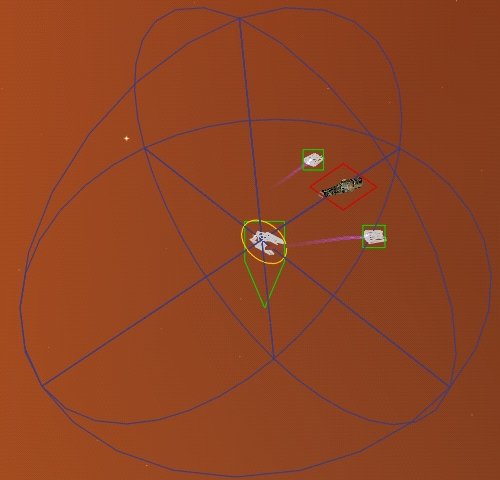
- The nearer points of the polyhedron will collapse together and move toward your
force (initially targetted on the small-fry). Set pairs of your SC's to take a
(E)IF each. This will probably trigger the collapse of more of the polyhedron,
targetted on the nearest SC so make sure you identify their target and keep that
SC working elsewhere!
- Do not dock a 'target' with a Carrier, or place it within a cloak-field.
This removes that ship from the enemies' minds and they cannot retain it as a
viable target so they will turn on their nearest targets and fry your SC's (a
SC may survive three blasts of an Ion Beam, but only just)
- The pilots of the (E)IF's seem one-track-minded and none to clever so your SC's
can buzz around them and clamp onto them and take them home without ever a
squeek of complaint from the (E)IF's. The SC's are completely ignored once the
enemy is targetted on a distant ship
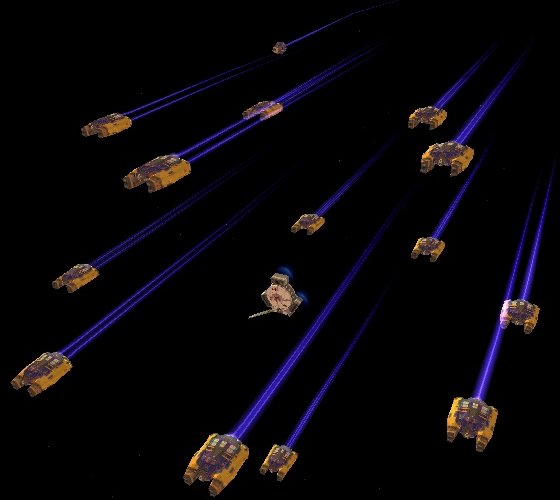
- In the first collapse, there will probably be too many (E)IF's for you to
capture in the time allowed. Some may, regrettably, have to be destroyed.
But after this one large collapse, engineer smaller, more controlled collapses
for you to wittle down the polyhedron further and further. This will take time
and patience
- (It is good practise to Retire the (E)IF's as they are converted. They cost
650RU to manufacture so you get 390RU
from retiring each one. At the end of the level, I had 155 IF's. I selected
them all (in Military Parade with my MS) and ordered them to Retire. They
streamed toward the MS and lined up in a cloud in front of the portal. The
further ones still kept coming and colided with the front ones, pushing them
up to the portal. I watched for ten minutes and judged that it would take a
while! Three hours later they were just finishing up and I had made
55kRU's profit from my piracy)
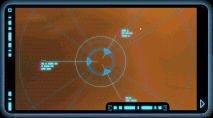
- If you have been watching your nearer RC's, you will have spotted a HS window.
At some point, Fleet Intel will notify you that a small enemy force has arrived
through it. Your MD's ought to be sent onto the (E)SCr. Once they are dealt with,
fly some small-fry through the area so the (E)MD and 2x(E)D will target them.
Then rescue them. (NB: for some reason, the SC's go very slowly when
dragging these particular (E)CSp's back to the MS. Anyone know why?)
- Also capture the 2x(E)SF to your local Carrier. Refuel your SC's frequently
- Fleet Intel recommends you blast these HS windows. But then again, they are
a source of income...
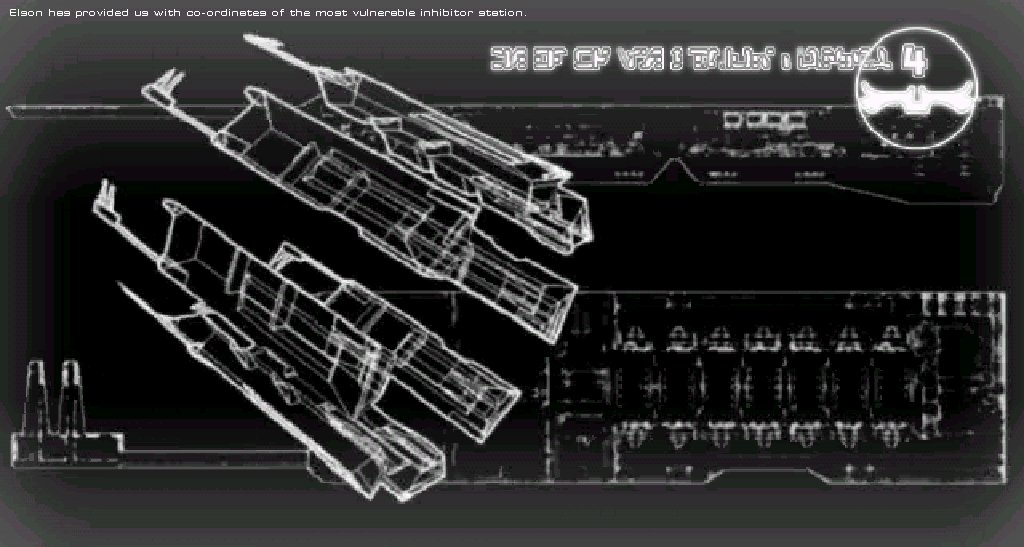
- Send in some CF's to spy out the Hyperspace Inhibitor (but watch their fuel
levels.) You will see four groups of (E)CSp's. There is a (E)Carrier which
produces (E)SCr and with which the (E)RC's dock. [FA] of it is (E)HC + 2x(E)CFG.
[FR] of the (E)Carrier is (E)D + 2x(E)CFG's. Below them is 3x(E)D's + 2x(E)CFG's.
(A lone (E)IF lurks beneath the Hyperspace Inhibitor; possibly the 'seed' ship
for the 'Sphere'?) Within the Hyperspace Inhibitor are two (E)RCn's
- Once half the polyhedron is removed, start sending in Hunting
Parties and remove these juicy prizes. With any luck, (E)IF's from the
polyhedron will follow them for you to nab as your SC's fly past your Carriers
on the way back to the MS
- There is another HS window [F] and a little [AL] where you sent a RCn. This
will produce an identical fleet to the one you took care of last time. Repeat
your previous success. In time, the third HS window [F] and a little [AR]
where you sent a RCn will follow suit. Do likewise
- When you have rescued all but about five of the (E)IF's, the remainder will
flee off the edge of the map and it is unlikely you can recover them
- Send your offensive force to the Hyperspace Inhibitor. Set MD's on the (E)SCr
and beamers on the Hyperspace Inhibitor. Try not to burn the (E)RCn's; rescue
them once the paddles of the Hyperspace Inhibitor are out of the way. Capture
the (E)Carrier and its following of (E)RC's
- It may be that you have difficulty HSing out of this level if your Military
Parade of Frigates extends beyond the map limits. Some solutions to this have
been suggested:
- Retire all your IF's; they aren't necessary in the later levels
- Retire some of them
- Get some IF's to form Military Parade with one of your Carriers
before initiating the HS jump
- Move the offending IF's somewhere where they are happy (ie [LF])
to be. Then press 'J' (for Hyperspace Jump) and 'SPACE'
(to Quicklaunch). Hopefully they will start to move into place
and before they get a chance to think about not liking their
situation, you will have QuickDocked and their HS windows will
be opening