|
Walkthrough
Level 15
|
|
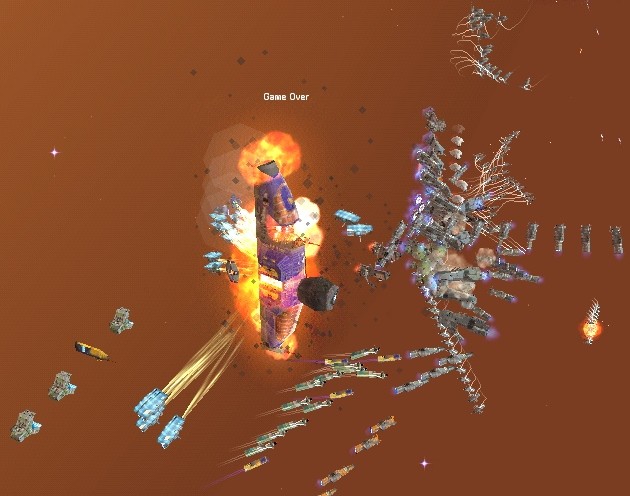
CHAPEL PERILOUS
[0:4:0:0 -> 160]
- Strategic Approach
[0:4:0:0]
- Pause the game
- Keep your SCr Docked
- Keep any IF's in Military Parade
- Move your AF's to [FR]
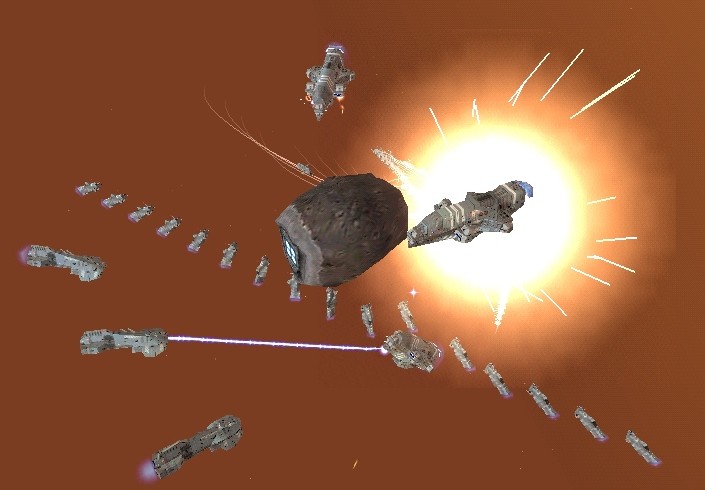
- Move your HC's and MBF's [F] to take out the Headshot Asteroid
when it's close enough
- Move your MD's above the HC's and spread them out so they don't
shoot each other
- Move your D's anywhere in front of the Military Parade line
- Move your Carriers up and behind their current location so that
they don't get run into or shot at
- GWG's are useless in the last level so use them all up here.
They can be useful in front of the MS where the (E)SCr will arrive:
-
36x(E)Interceptors, 20x(E)Heavy Corvettes, 16x(E)AF's will veer to
[R] and attack AF's, SF's and IF's
-
36x(E)Defenders, 20x(E)MGC's, 16x(E)AF's will veer to [L] and attack
a random ship from your AIF's, MBF's and Carriers
- Put your SC's below the HC's to keep them out of harm's way
- Let your GWG's and AF's take care of the (E)SCr to the right and
your GWG's and D's the (E)SCr to the left
- Set the rest of your D's on the two wings of 12x(E)AF's
- Set your HC's and MBF's on the HSA. Hopefully the (E)D's will target
your HC's; they have much more armor and only two Ion Beams
(which are much more effective against the HSA than gunfire)
- If one of your HC's starts loosing 'health' significantly, set
a couple of SF's to repair it
- While the 4x(E)D's are merrily blasting away at your HC's, bring them
in with your 12xSC's
- If you really want you can try nabbing a few (E)AF's also
- Once the HSA is gone, any stray (E)SCr should be left to comit suicide
and any (E)CSp's can be burnt or rescued
- Sadistic Snooker
[0:0:2:0]
- Set all your ships to Evasive so they won't shoot a thing
- Click one SF and they'll all be selected. Activate their special on
the MS (so that the far ones will start moving now)
- Choose whichever HC you like least (or take a few if you like) and
move them forward. Set them to Agressive
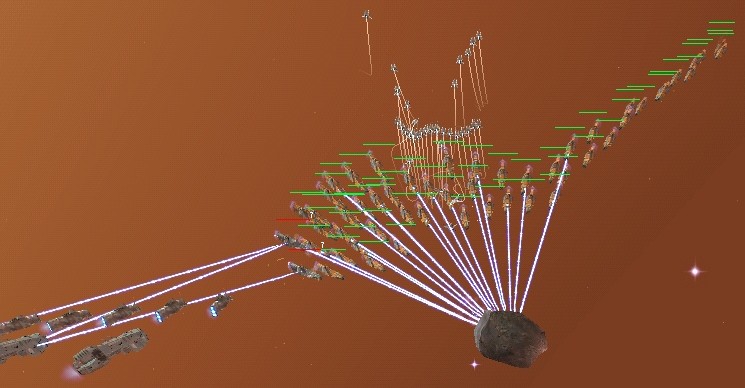
- Keep them moving forward but make sure they are to the left of the
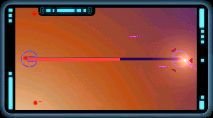
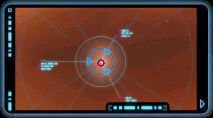
path of the Headshot Asteroid (to check, Pause and go into the
Sensors Manager. Line up the focus crosshair with the MS. The HSA
will be on one line)
- As soon as Tactical Overlay lets you see the HSA, set your selected
HC's to attack it. Don't bother to shoot any of the small-fry
- With your HC's on Aggressive, they are quite happy to collide with
the HSA (it's alright - you don't need any next level). This bursts
them open, of course, but it offsets the HSA a bit so that when it
collides with the MS you get a glancing blow which destroys the HSA
and damages the MS a bit
- Their small-fry will pelt your Kamakaze HC's for a bit, then go for
your SF's
- Wait for Fleet Command to say "Prepare for impact". Focus on the MS,
sit back and enjoy the show!
- The HSA will smack into the side of the MS and die. Your SF's will
spew green stuff at the MS and soon it will be right as rain again
- The (E)small-fry will all stop attacking whatever it was they had
been intent upon killing and dash for your MS. This leads to some
quite spectacular shots. Often the (E)SCr don't manage to kill
themselves on the first bounce so they have to try again
- Don't let you CSp's try to stop the enemy - it is much more fun to
see them pelting down the Sensors Manager screen and lemming it
into your MS at full speed <grin>
- Mutual Zapp Branaginism
[0:22:20:0]
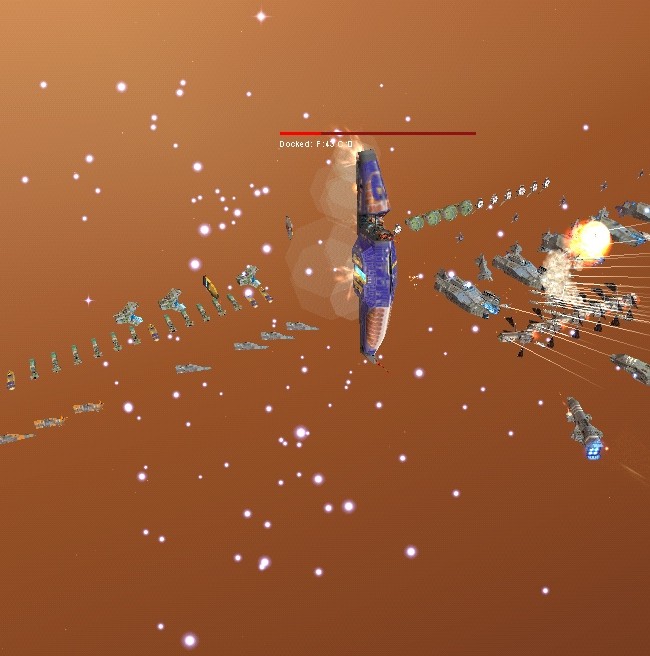
- Keep some IF's from last level; we're going to send wave after wave
of them at the Headshot Asteroid in this level; there's not much
else you'll use them for
- Set all your ships to Evasive so they won't shoot anything that you
don't tell them to
- Click one SF and they'll all be selected. Activate their special on
the MS
- Before you get to see Fleet Intel's analysis of the situation, get
your IF's moving in wings of ˜20 or so. The ones at the far
end of the Military Parade will take a long time to get 'there' so
set their destination to just in front of your MS where the HSA will
end up. The IF's nearer to the MS (ie those you rescued in Lev05)
should be sent to Move to the HSA's current location on the 'map'
- The (E)small-fry will anticipate your imminent attack and so will
send the 36x(E)Interceptors, 20x(E)Heavy Corvettes, 16x(E)AF's to
attack your IF's. The IF's will ignore this threat, though, because
they are in Evasive
- Once the HSA comes into view, set the closest two wings of IF's on
it. About five IF's will probably already be toast
- Hopefully the IF's will avoid colliding with the HSA since their
Ion Beams do it more damage than a battle of armor levels
- When the HSA progresses a bit further, set the third wing of IF's
onto it
- Continue in this vein. You will likely loose ˜20 IF's
before the HSA explodes
- The enemy will then all try to divebomb your MS. I don't know how
they manage to Kamakaze their CSp's; I can only manage to do it to
my SCr (press K when they are already attacking an enemy)
- Set pairs of SC's zipping back and forth from the advancing (E)AF's
to your Carriers. (E)D's are much more useful because they have Ion
beams, but go for the (E)AF's when you've got the front two (E)D's
(the back two take ages)
- Try to stop any enemy craft from colliding with your CSp's
(especially any MBF's). Shoot the enemy if necessary
- You could try to do all this with your CSp's not in Evasive. But then
the problem is that all the beamers go mad when enemy start pelting
the MS and they blast any friendlies in front of them before
inflicting any damage on the enemy. The HC's usually blow a couple of
my Carriers at least
- Dock all your SCr with your MS. Set Autolaunch to off on all your
Carriers and MS
- Dock all your SC's with the first Carrier (the one which is in the
leftmost slot in the Launch and Build Managers)
- Retire the other Carriers; they get in the way next level and don't
do much. One is handy. There's no need to build anything more but
you get 1200RU's for each one Retired (NB:
make sure the Carriers are empty before you retire them)
- You no longer need the IF's since D's and HC's will do the hard
work for you next level. Keep 10 if you must; they can help take
out the (E)IF's which rise to the MS at the start. If you have the
patience, retire them all (you get ˜5.5kRU's
for retiring 155xIF's but it took me over two and a half hours!!)
Otherwise, just self-destruct them